Here you will find the basic functions you will need to design your fidget and some of the instructions you need to complete it.
First change the random name of your file to “Fidget” + “Your Name” + “1”
- Here we have the “Direction Cube”. This allows you to move your workspace around to view your creation from different angles.
- The “Home” button allows you to recentre your workspace to its original position.
- The “Duplicate” button, which makes copies of your selected objects.
- “Undo”. Go back however many steps in your work that you need to.

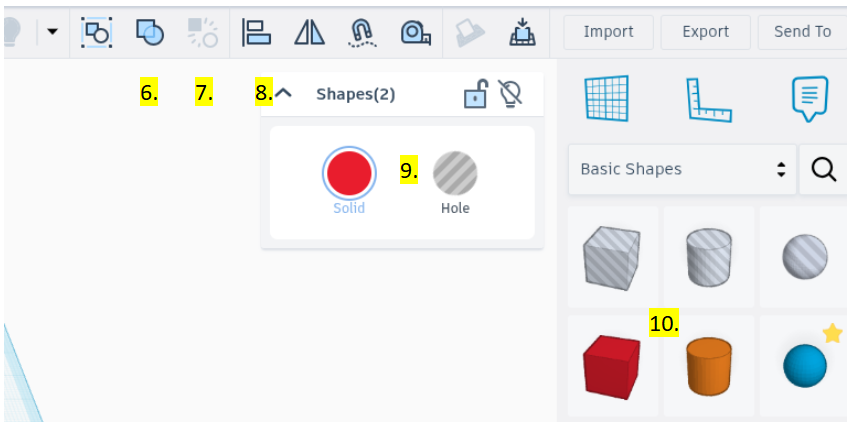
- “Group”, combine your objects together.
- “Ungroup”, split your objects into their individual parts.
- “Align” lining up your objects with precision.
- “Solid and Hole” Switch between solidifying and hollowing out objects. (You will also need the solid button for another task).
- “Tool bar” select your shapes and text from here.
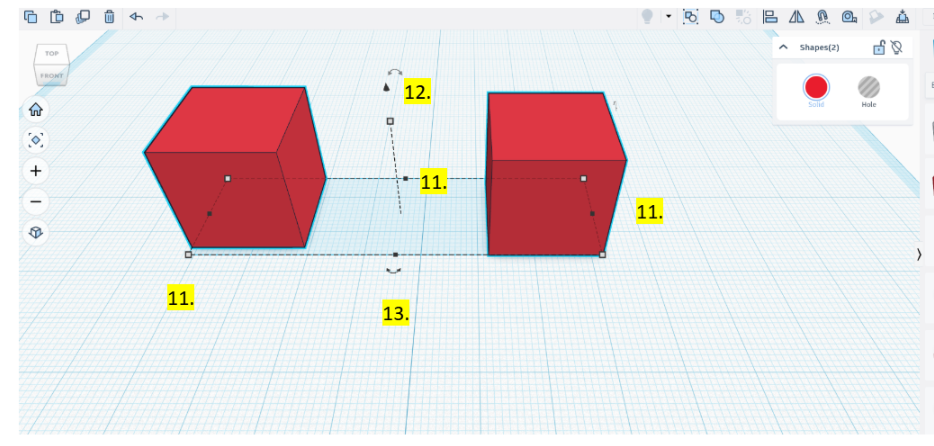
- “White and Black Squares”. Changes the height, width and depth of your objects.
- “Black Arrow”, lifts your objects straight up and down.
- “Smaller Arrows”, Rotates your objects in 3 dimensions.
Now you have all of the functions you need let’s start making our fidgets
Drag a solid sphere onto your workplane and change it’s size to 50mm x 50mm x 50mm
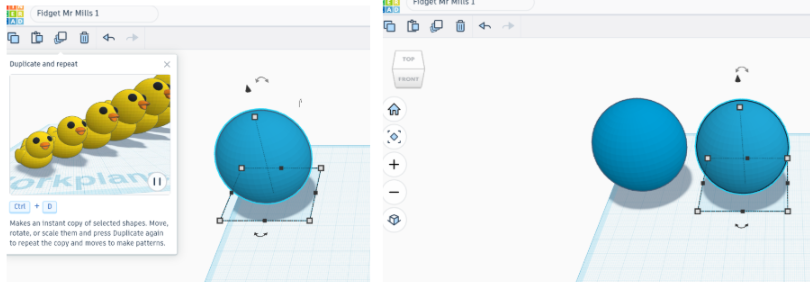
Move your sphere to the edge of your workplane and duplicate it. (When you duplicate your shape it copies directly over the original so you will have to separate them)
Change your new sphere from solid to hollow by clicking “hole” and shrink it to 44mm x 44mm x 44mm
Duplicate this sphere and make the new one solid and shrink to 43mmx43mmx43mm
Same again, duplicate, hollow the sphere and shrink to 37mmx37mmx37mmm
Duplicate new sphere, make solid and shrink to 36mmx36mmx36mm
I bet you can’t guess what to do next…… Yep, duplicate, make hollow and shrink to 30mmx30mmx30mm
Not many left. Duplicate, solid and shrink to 29mmx29mmx29mm.
Two left. Duplicate, hollow and 23mmx23mmx23mm
Finally the centre piece. Duplicate, solid, and shrink to 22mmx22mmx22mm
Now you have something new to do. First hold shift and select all of your solid spheres and click on solid to open the colour menu, then turn transparent on. This will make it easier to see what you are doing.
Hold shift and select your two biggest spheres (make sure they are the only two objects selected) and click align.
You will see your two objects surrounded by black dots. Click all 3 middle dots two line your two spheres together. If you have done this correctly your hollow sphere should disappear into the solid one.
With your shapes still selected, bind your two spheres together with the group button, move it around to check you have done it correctly. If you haven’t, press the back arrow and try again.
Repeat the last two steps or your next 3 pairs of spheres, leaving the smallest sphere on its own.
Press “ctrl + A” to select all of your spheres and select the align option once more and press the same three dots to align all of your spheres.
Group your spheres together.
Pull out a “hole cube” and manipulate it so it surrounds your sphere, shrink it down so its height is 16mm.
Duplicate your new shape and use the black arrow to lift so it lines up with the top of your sphere. (It should line up at 34mm).
Ctrl + A to select everything and group it all together.
Use the black arrow to lower your fidget back down to 0 so it touches the workplane.
Adding text. First, press the shift key and make you fidget bigger, this makes it easier to add your text.
Select the text from the toolbar and drag it into the middle of your fidget.
Change the text to your initials and adjust the size so it fits within the circle, you may also change the font if you wish.
Change the text from solid to hole and use the middle white square (from underneath of your shape) to extend your text down into your fidget approximately 1/3 deep.
Group everything together.
Select your fidget again and look for the 3 double ended arrows around your shape. Select one that is above your fidget and use it to rotate it 180°.
Repeat step 21 to add more text, however this time write 6B instead of your initials.
Shrink your fidget back down to 50mmx50mmx18mm
Your fidget is ready for printing.